
MakeCode and micro:bit Reference
micro:bit Basics

Many SCALE K-12 units contain activities that use micro:bits as part of the microelectronics integration. A micro:bit is a programmable mini-computer with a set of sensors and interface points that allow students to explore coding through hands-on coding tools. Students can experiment with coding blocks and quickly see how their code works in real-time. A micro:bit can work alone or with external components. Programs can be as simple as a flashing heart on the built-in LED screen or as complicated as AirTag-style trackers, voice-activated locking devices, and many more.
The best place to learn about the micro:bit, its components, and its features is on the BBC micro:bit website. They maintain a user guide that has several jumping-off points and is a great place to start.
Learn more about the micro:bit
MakeCode

Just like any computer, the micro:bit requires a programmer to design code to make the micro:bit do something. The micro:bit programming starts in a web-based interface called MakeCode. MakeCode is a programming framework that introduces programming in an approachable way. Micro:bit beginners start with block coding on MakeCode, and block programming is flexible for a range of programming knowledge. MakeCode maps the blocks directly to a programming language.
MakeCode makes blocks, JavaScript, and Python editors available in its online programming platform. Once a programmer is comfortable with block coding, they can move to JavaScript or Python, which will have more options and commands available. There is a microPython editor and option available as well.
Program in MakeCode
MakeCode’s micro:bit programming site: https://makecode.microbit.org
Programming Basics

Very basic knowledge of programming concepts will help as you work with MakeCode. There are a large number of web resources about programming basics. Some terms and concepts you may want to be familiar with are variable, conditional, loop, basic Boolean logic, inputs/outputs, and code flow. These concepts are universal across all programming languages.
Variable: how the program stores data and information. Variables are usually created by the programmer, although some MakeCode blocks have built-in variables pre-defined. Variables are in red ovals in MakeCode.
Conditional: a structure that makes a decision about which group of commands to perform. Conditionals require a relational or logical condition that has only one answer: true or false (or yes/no). The answer lets the conditional select what commands to perform. “True” will run the commands on that decision path. “False” will skip that path. In MakeCode, these are the blocks in the Logic toolbox. IF-then-ELSE is the structure type and the hexagons are used to define the conditions within the structure.
Loop: a structure that repeats its group of commands. There are two types of loop: One is count-controlled and will repeat a set number of times. The other is condition-controlled and will repeat until a condition is met. In MakeCode, “forever” is a special type of loop called an infinite loop. It has no count or condition to stop it. Other loop types are in the Loops toolbox. REPEAT is a count-controlled loop (as are the FOR options). WHILE is the condition-controlled loop type.
Boolean logic: use AND, OR, and NOT to add complexity to conditions. AND is true when two condition statements are true. OR is true when one or two condition statements are true. NOT reverses true to false or reverses false to true. In MakeCode, these are hexagons in the Logic toolbox.
Inputs: information that the program takes in. Sensor readings are a type of input.
Output: information that the program sends out. Displays are a type of output.
Code flow: all programs work in sequential order from first command to the last. The program will execute every line in the sequence exactly as it is written. Conditions allow the code to skip, select, or repeat commands but do not alter the fundamental direction of the code’s flow.
Getting and Sharing MakeCode
When using MakeCode in the classroom, you need a way to share code with others. Teachers may need to see student work or provide students with templates; students may need to share code within their team or share their final solutions with the teacher.
Sharing MakeCode web links is an easy way to allow others to allow others to view, edit, and use your code. SCALE K-12 units with MakeCode will share templates and solutions via share links. You can also share downloaded program files, called HEX files because they have the .hex extension.
How to access shared MakeCode
From a provided MakeCode link:
Click the link to open the code in a browser
Click Edit or Edit Code.
Opting to edit code from a share link will automatically add the code to your MakeCode account (or store the code in your browser cache if you don’t have an account).
From a HEX file:
If necessary, download the HEX file onto your computer and find it in your file structure.
Go to the MakeCode programming site in your browser.
Click Import in the My Project area, then click Import File. Follow the instructions for finding the HEX file you want to import.
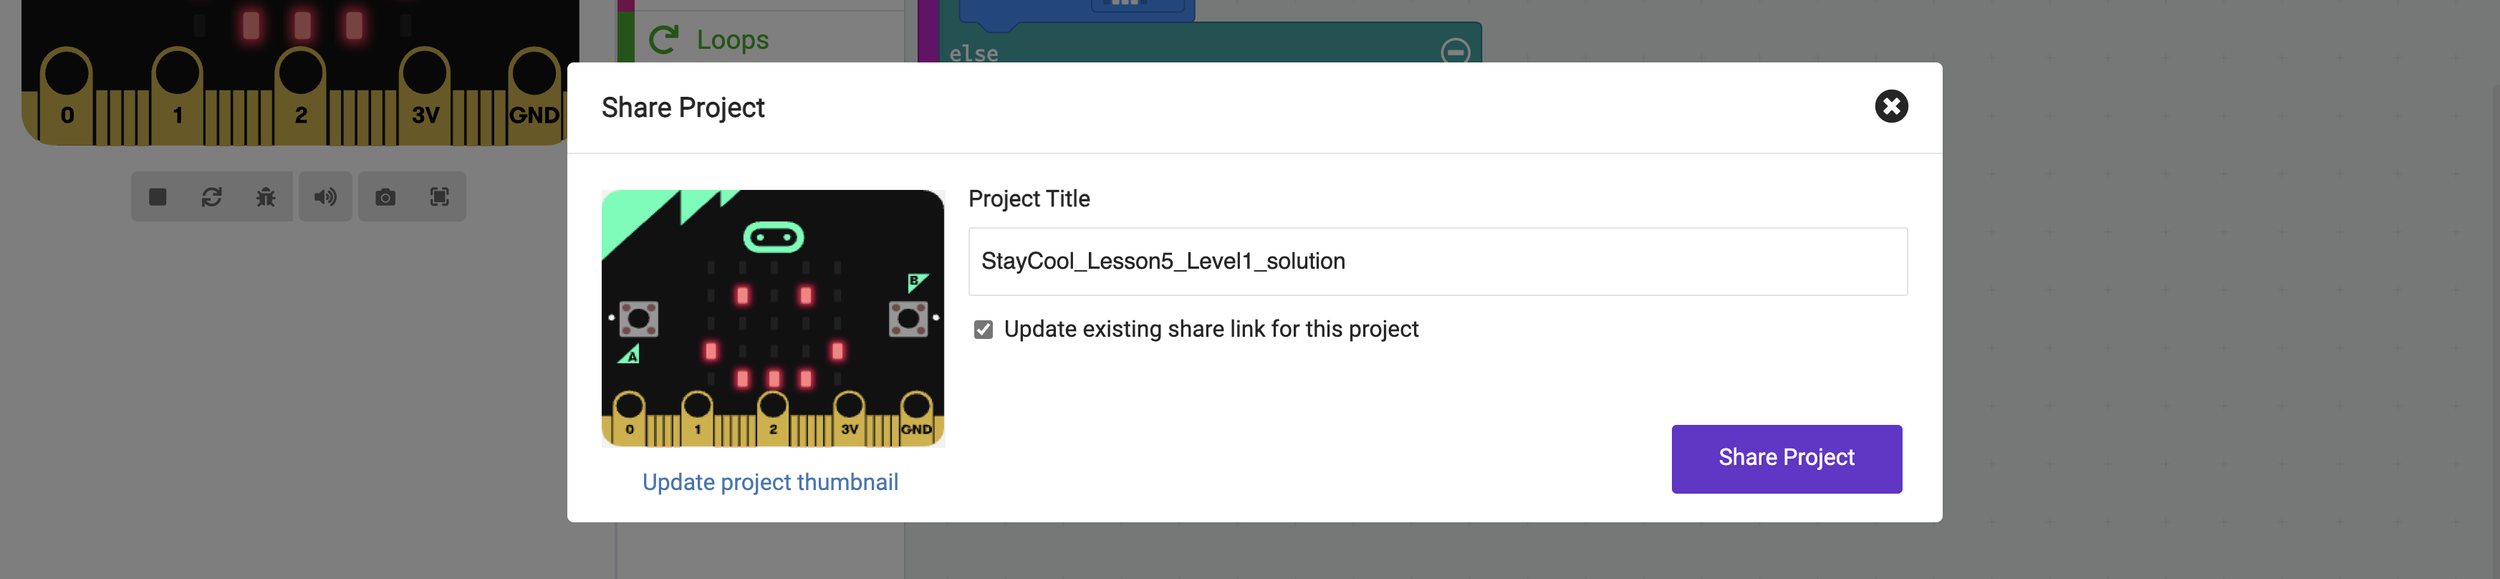
How to share MakeCode via a link
With your code open in the MakeCode editor:
Click the Share icon (upper right, near your account profile)
Click Share Project.
Click Copy to copy the link (or select another share method).
Learn more at MakeCode’s Sharing your project.
Micro:bit Classroom
There is an option for you to run a micro:bit classroom with your students. This has benefits and drawbacks, depending on your lesson goals. Sharing projects with students is easier in the micro:bit classroom. Tutorials (those on makecode.microbit.org) cannot be shared via the classroom.
Learn more in the micro:bit classroom user guide.
Do I need an account? What about students?
No, but it is a good idea for teachers. You should consider making a personal MakeCode account to save your teaching materials. This will allow you to test programs and to share them directly with students, including any updates that you need to make to already-shared MakeCode.
Students do not need an account in most circumstances. MakeCode gets stored in your browser cache if you don’t have an account, and that stored code will stay saved even if you close the browser or power down the computer. Students can revise and edit their code in MakeCode from the cache for most units. The primary downside to this is that if something happens to their cache, then their code will be gone forever. But for most uses, this is an acceptable risk.
Using the micro:bit classroom removes the need for student accounts and makes sharing back to you easier.
Transfer MakeCode
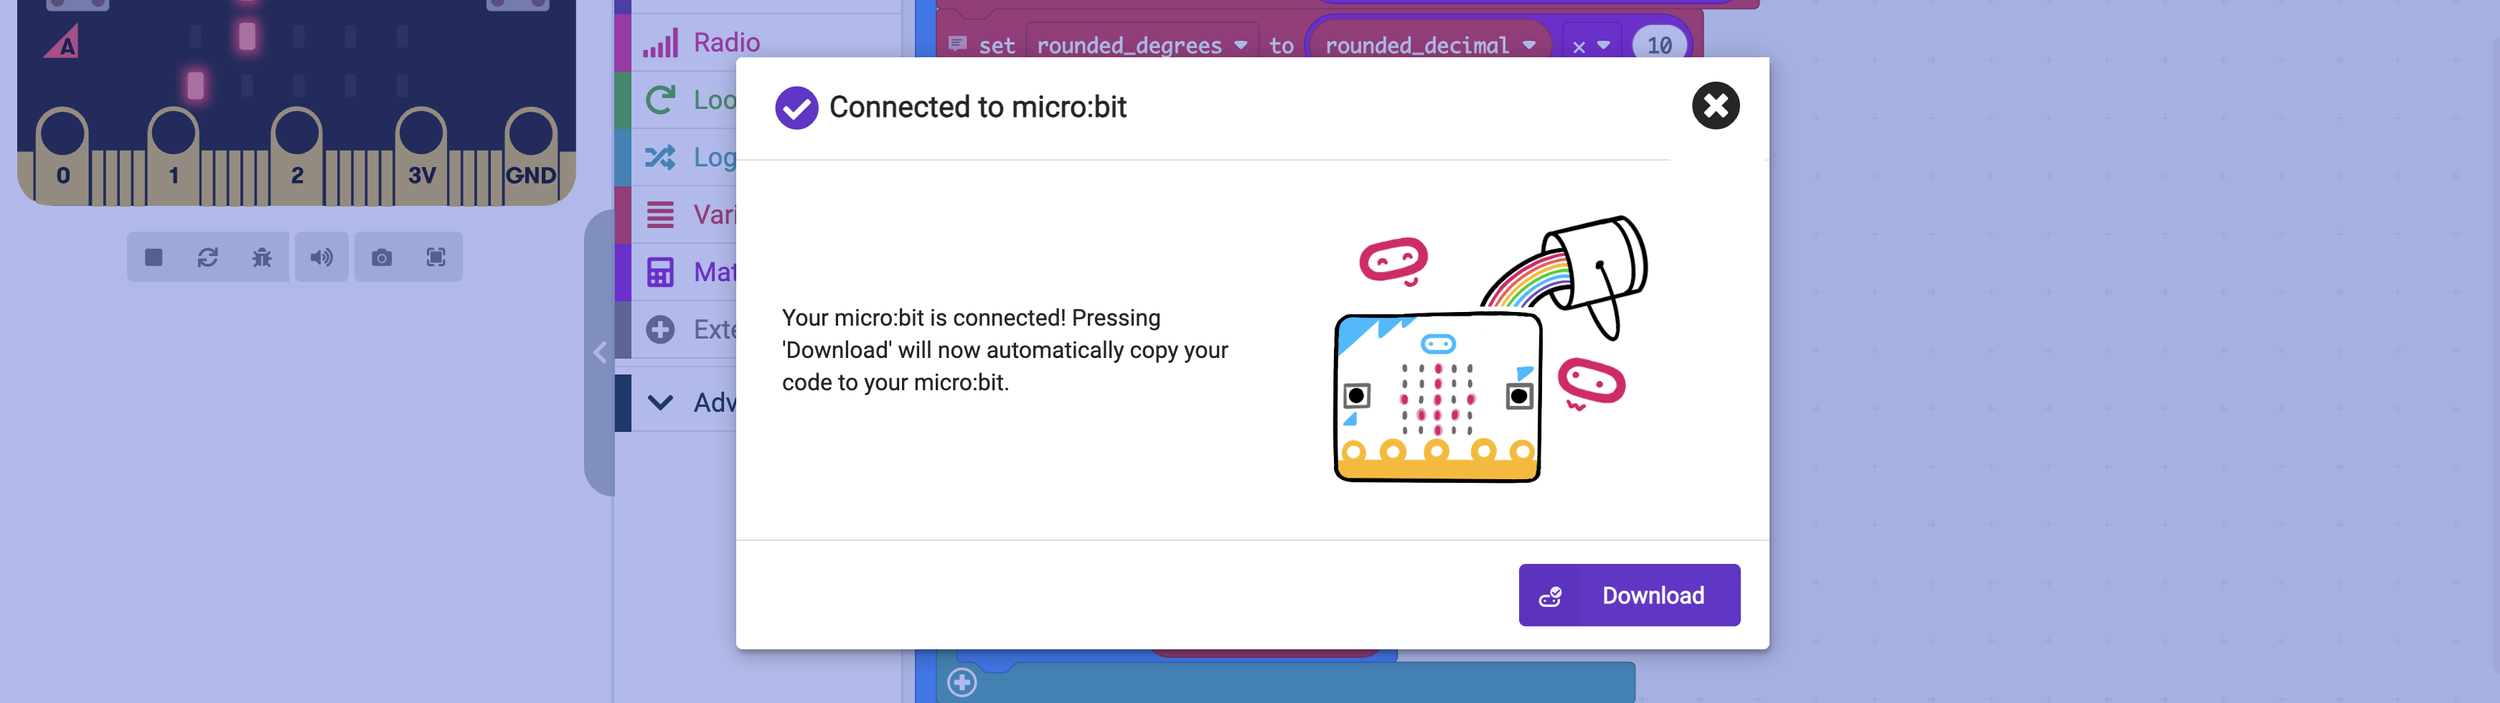
Teachers and students will need to transfer their MakeCode onto a physical micro:bit for many projects.
Have the MakeCode open in a browser that supports WebUSB if possible. Google Chrome and Microsoft Edge are recommended by micro:bit and MakeCode. WebUSB allows users to use the one-click download feature to directly save MakeCode onto their micro:bit straight from the browser, no need to download the code file first.
Be prepared to help students with code transfer. Even with WebUSB browsers, there can be transfer issues. If WebUSB doesn’t work, or you use an unsupported browser, you will transfer the code by downloading onto your computer before copying it to the micro:bit. You may need to find the downloaded HEX file in the student’s file manager and show them how to drag it to the MICROBIT drive.
Using iPads is possible but may require additional support from your school IT personnel.
Learn more in the Transfer code to the micro:bit section of the user guide.
Troubleshooting Help
You may see a popup window warning the micro:bit did not properly eject anytime the micro:bit resets, saves a program, or gets disconnected from a computer. Ignore this; it is normal and expected.
Below are some links to help you troubleshoot if you or students encounter an unusual problem.