
How a micro:bit Works
The Processor
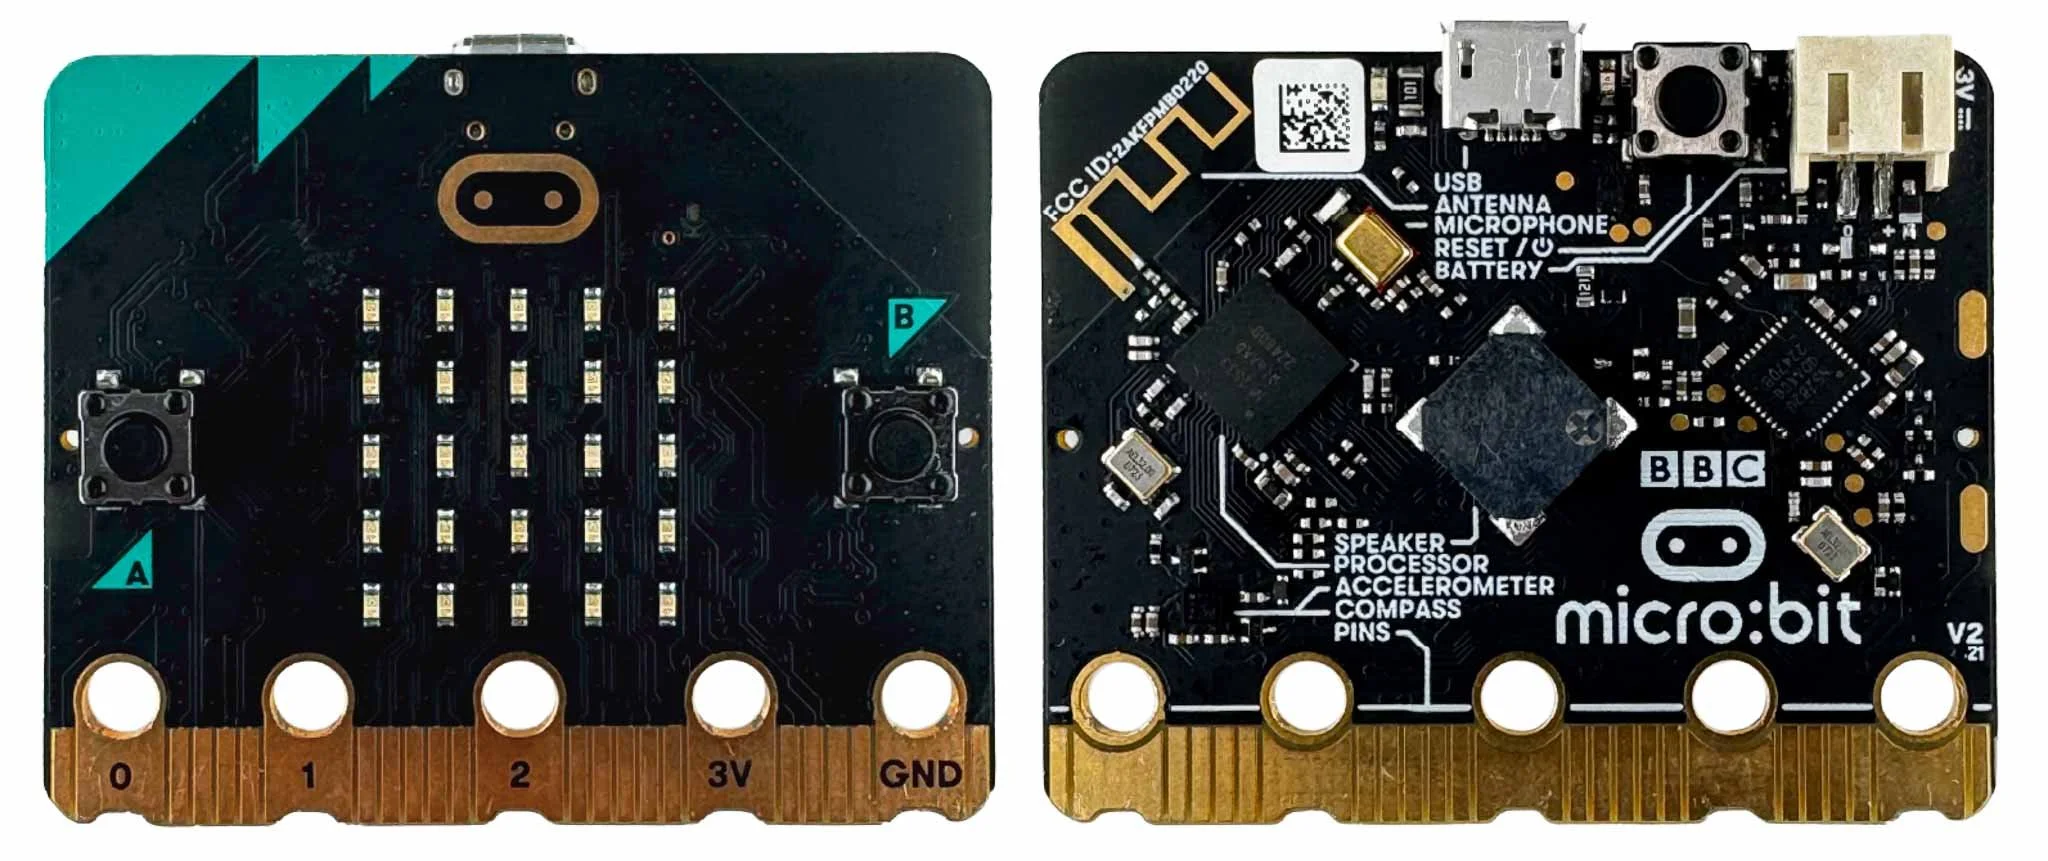
A micro:bit is a small, programmable microcontroller board designed to introduce students to coding and electronics. It features a variety of built-in sensors, LEDs, buttons, and connectivity options, making it an accessible tool for learning about digital technology and programming. The micro:bit is widely used in educational settings to create interactive projects, such as games, robots, and simple electronic devices.
At the heart of the micro:bit is the microcontroller, which contains the processor (the “brain” of the device), memory, and input/output (I/O) peripherals. The micro:bit is powered by an nRF52833 microcontroller from Nordic Semiconductor, which includes a 32-bit ARM Cortex-M4 processor. This processor is efficient and capable of handling the various tasks and inputs required for electronics projects, such as running code, managing sensor data, and communicating via Bluetooth. The nRF52833 also integrates memory and wireless communication capabilities, allowing the micro:bit to connect to other devices and networks.
In the context of the micro:bit, “32-bit” refers to the architecture of the microcontroller’s processor. The “32-bit” designation means that the processor can handle data in 32-bit chunks, which directly impacts its computational power and efficiency. A 32-bit processor can perform more complex calculations and process larger amounts of data in a single instruction compared to an 8-bit or 16-bit processor. This enhances the micro:bit’s ability to handle tasks like running more sophisticated code, processing sensor data, and managing inputs/outputs simultaneously.
A processor works by executing instructions to perform specific tasks, based on the code it has been programmed to run. Here’s an overview of how this process unfolds.
Receive the Instructions
The micro:bit needs to told what instructions its user wants it to execute. That happens in two steps.
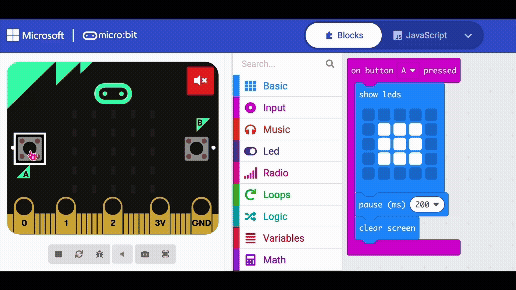
Programming: You write instructions as code using a coding environment, such as Microsoft MakeCode, Python, or JavaScript. The code specifies a series of instructions that tell the processor what to do when it's powered on.
Uploading Code: Once you've written the code, you upload it to the micro:bit's processor via a USB connection or wirelessly. The code is stored in the micro:bit's memory.
Process the Instructions
Once the micro:bit processor has your code instructions in its memory, it needs to turn those instructions into actions. At the heart of the micro:bit is the microcontroller, which contains the processor (the “brain” of the device), memory, and input/output (I/O) peripherals.
The ARM Cortex-M4 processor within the micro:bit reads the instructions from memory, processes them, and executes the tasks as directed by the code. The 32-bit architecture allows the processor to handle complex tasks and manage multiple operations efficiently.
Interact with Components
When you write code, you tell the micro:bit what inputs to use, how to process that information, and what outputs to produce. The micro:bit then interprets your requested inputs and delivers your desired outputs..
Inputs: Inputs are information that enters into the code from outside the code. The micro:bit can receive inputs from various sources. Inputs can come from physical interactions with the micro:bit, like button presses or motion sensing. They can come from internal sensors built into the microcontroller, like temperature or magnetometer. They can also come from external devices attached to the micro:bit that provide input signals, like a water-level sensor. For example, you might program the micro:bit to respond when someone presses one of its buttons. Or, you might tell the micro:bit to respond based on the temperature from its internal temperature sensor.
Processing: The processor interprets these inputs according to the instructions in the code. For instance, if your code says "display a smiley face when button A is pressed," the processor executes exactly that task.
Outputs: Outputs are how the micro:bit sends information out to the user. The micro:bit can output signals to various internal components, such as LEDs or speakers, or to external devices like motors or OLED screens. It can also send data via Bluetooth or other communication protocols. The microcontroller controls these outputs based on the code instructions, enabling the micro:bit to interact with the external environment.
Analog to Digital Conversion: Many sensors (like light or sound sensors) produce analog signals with continuous voltages. Since the micro:bit can only process digital data, it uses a 10-bit analog-to-digital converter (ADC) to translate these analog signals into digital signals. Due to its 10-bit resolution (2^10 = 1024 possible values), the ADC converts incoming analog voltages into a digital scale from 0-1023.
Real-Time Operations
The micro:bit operates in real-time, meaning it processes inputs and produces outputs almost instantly. This capability is crucial for interactive projects, where the micro:bit needs to respond quickly to user inputs, sensor data, or other stimuli. Note that some limitations of MakeCode can introduce lag into operations. For example, the ‘forever’ loop has a 20-ms pause between iterations.
Power the micro:bit
The micro:bit is powered by either a battery pack or a USB connection. The microcontroller requires power to execute the instructions and manage the components connected to the micro:bit.
Example in Action
Imagine a simple program that tells the micro:bit to flash an LED when a button is pressed. Here’s how it works:
You write the code and then transfer it to the micro:bit’s processor memory.
You press the button, which sends an input signal to the microcontroller.
The processor interprets this signal based on the code, which says, “If the button is pressed, turn on the LED.”
The microcontroller sends a signal to the LED, causing it to light up. It leaves the LED illuminated for the programmed amount of time and then turns off the LED, causing the ‘flash’ effect.
In essence, the micro:bit (like any processor) works by continuously executing the instructions it has been programmed with, interacting with its inputs and outputs to perform specific tasks, and responding to changes in its environment in real-time.
micro:bit Resources
New to micro:bit? Try the micro:bit features and user guide
Want technical details for micro:bit?